In this blog, I talk about the benefits of defining your infrastructure as code using AWS CloudFormation from time to time. You define the properties of your AWS resources in a template and create a stack from it. When you need an update, you edit your template accordingly and update your stack. Don’t need a resource anymore? Just remove it from your template and update your stack again. Or, delete your stack if you no longer wish to keep any of its resources. In an ideal scenario, you keep your infrastructure code, your CloudFormation templates, in the same repository as your project and use a CI/CD pipeline to deploy it.
You can manage most AWS resources with AWS CloudFormation like this. However, Amazon EC2 instances are somewhat different. Again, you have properties like the subnet, instance type, or security groups of an EC2 instance as in other resource types. But, you also make custom, OS-level changes after creation, such as installing software packages, downloading or configuring files, etc. Besides, you may need to update this configuration later. It is why configuring an EC2 instance with CloudFormation needs more attention, and we have a dedicated section about it in my AWS CloudFormation Step by Step: Intermediate to Advanced course.
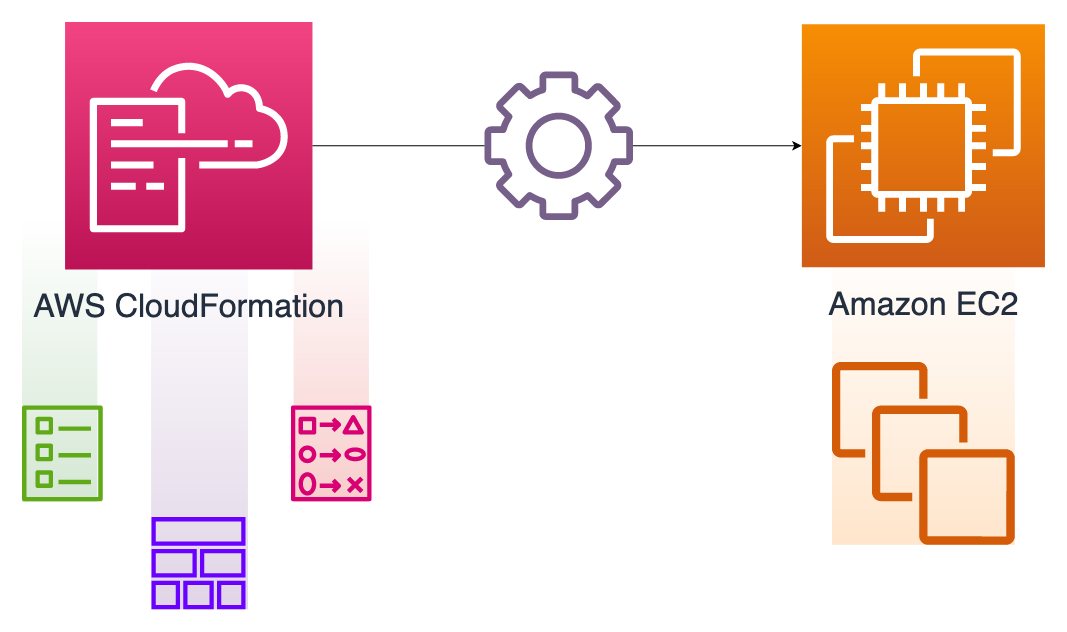
In this post, I will summarize how to manage EC2 instances using AWS CloudFormation. Firstly, we will discuss the UserData property. Then, we will continue with AWS CloudFormation helper scripts: cfn-signal, cfn-init and cfn-hup. We will also see the CreationPolicy attribute along the way. So, let’s start!
UserData property: Configurations at launch time
So, how do you install a package or download a file to an Amazon EC2 instance at launch time? If you are used to creating an Amazon EC2 instance from AWS Management Console, you would already know that you use the User Data field to make OS-level configurations like these on your new EC2 instance. You provide a bash script in this field with the commands to be executed after AWS provisions the EC2 instance.
Hence, it will also be the method when using AWS CloudFormation to launch an EC2 instance. Amazon EC2 instance resources have the optional UserData property for your commands, which corresponds to the same field on AWS Management Console. You type your bash script to this field, including your commands. Then, they will be executed after the EC2 instance is provisioned.
The only difference is that you need to provide a Base64 encoded string to the UserData property in your template. So, we use the AWS CloudFormation’s Fn::Base64 intrinsic function for this and provide our bash script to it, and it encodes the contents of the script automatically.
Let me give you an example. This is the UserData section of a YAML template that installs the Nginx package on an Amazon Linux version 2 EC2 instance at launch.
...
Resources:
  ServerInstance:
    Type: AWS::EC2::Instance
    Properties:
      ...
      UserData:
        Fn::Base64: |
          #!/bin/bash -xe
          yum update -y
          amazon-linux-extras install -y nginx1
          service nginx start
...
Please note Fn::Base64 usage here. Pipe symbol | in YAML places a newline character in every line followed. It makes our script readable.
In this example, we update our yum packages first. Then, we install the nginx1 package from the amazon-linux-extras repository. Of course, these will be different if you use another OS like Ubuntu. And finally, we start the Nginx server installed. It is a straightforward example.
Using the UserData property for installing packages at launch is OK. But the problem is that you cannot use the User Data script after creation to update this configuration. The UserData script is only executed at launch, and your updates to it will be ineffective afterward. So, we need more methods to update our EC2 instance configurations after creation.
AWS CloudFormation helper scripts: Manage OS-level configurations at launch time and afterward
As you see above, we cannot use the same UserData property for our EC2 instance updates. Besides, if you need more commands to run in your script, it will get more complicated to make a change on it. So, AWS CloudFormation provides some helper scripts and a different way to define your configuration more descriptively to solve these problems.
But before that, we need to handle another issue that we can overcome with the cfn-signal helper script and the CreationPolicy attribute.
Cfn-signal and the CreationPolicy attribute
AWS CloudFormation marks the EC2 instance creation as a success as soon as the UserData script starts. It does not care whether the script succeeds or fails. As you will guess, this premature acceptance becomes very problematic, especially if you have other resources depending on this EC2 instance. Also, what if the script fails? What happens then? Hence, there should be a way to make the EC2 instance creation wait until all commands in the UserData script finish and signal our AWS CloudFormation stack about the result. So it can fail the stack creation or continue with the next resource. Luckily, we can use the CreationPolicy attribute and the cfn-signal helper script to achieve this.
The CreationPolicy attribute is a CloudFormation resource attribute that you can define on your EC2 instance resources. It pauses the resource creation for a specific time you define in your template and waits for a success signal to continue. If this success signal does not come within this period or a failure signal is received, it fails the resource creation, and the stack creation rolls back.
Let’s add a CreationPolicy attribute to our previous example. Please find it below and note that the CreationPolicy is not under the Properties section because it is a general CloudFormation resource attribute and you can also use it with EC2 auto-scaling groups. The ResourceSignal attribute is where you define the properties of the signal you define. Here, we wait for one signal for a timeout of 20 minutes, which are set at Count and Timeout attributes, respectively.
...
Resources:
  ServerInstance:
    Type: AWS::EC2::Instance
    CreationPolicy:
      ResourceSignal:
        Count: 1
        Timeout: PT20M
    Properties:
      ...
      UserData:
        Fn::Base64: |
          #!/bin/bash -xe
          yum update -y
          amazon-linux-extras install -y nginx1
          service nginx start
...
Of course, 20 minutes would be more than enough to install Nginx. But the CreationPolicy needs to receive a success signal when it finishes, and this is where you use the cfn-signal helper script.
AWS CloudFormation helper scripts are Python scripts to assist you in solving problems like we discussed above while configuring your EC2 instances. At this time, there are four of them: cfn-signal, cfn-init, cfn-hup and cfn-get-metadata. We will mainly talk about the first three in this post, but as side info, you use the cfn-get-metadata script to retrieve a metadata block from AWS CloudFormation when needed.
The CloudFormation helper scripts are installed by default on some Amazon machine images (AMIs), but it will be wise to update them at launch to use the latest version. So, again we use the UserData script as before. Then, after all commands finish, we place a cfn-signal helper script call at the end of the UserData to notify that our EC2 instance configuration completed successfully. Please see the final example below.
...
Resources:
  ServerInstance:
    Type: AWS::EC2::Instance
    CreationPolicy:
      ResourceSignal:
        Count: 1
        Timeout: PT20M
    Properties:
      ...
      UserData:
        Fn::Base64: !Sub |
          #!/bin/bash -xe
          yum update -y

          yum install -y aws-cfn-bootstrap

          amazon-linux-extras install -y nginx1
          service nginx start

          /opt/aws/bin/cfn-signal -s true --stack ${AWS::StackName} --resource ServerInstance --region ${AWS::Region}
...
Please note that we used the intrinsic Fn::Sub function before the pipe symbol | because we use some AWS-specific parameters in the script content. Here, the aws-cfn-bootstrap is the name of the package containing AWS CloudFormation helper scripts. To call cfn-signal, we need to provide its exact path on the EC2 instance. So, we use /opt/aws/bin/cfn-signal, which is the path on Amazon Linux 2 instances.
The explanation of the cfn-signal inputs is as below:
-sis the signal option with atruevalue denoting a success signal.- We also provide the stack name (–stack-name) and the region (–region) to the script.
- The value of the
--resourceoption is important. It should correspond to the logical ID of the resource where you send the signal. Or in other words, it is the place of the targettedCreationPolicyattribute. In our example, it is the same resource, ServerInstance.
Even our UserData script started to become complex. Hence, we need better ways to define our custom installations. Besides, we did not solve the inability to update problem yet. So, let’s continue our post with the remaining CloudFormation helper scripts.
Cfn-init: Initalizing your EC2 instances
The cfn-init helper script uses the Metadata section of the EC2 instance resource for the customizations performed. It defines these under the AWS::CloudFormation::Init metadata key that has a particular structure for installing packages, configuring files, downloading sources, managing services, defining groups or users, etc. I talk about these in more detail in my AWS CloudFormation Step by Step: Intermediate to Advanced course, and you can join it to learn more about them. Let’s keep this post as simple as possible.
For our example, we will take the Nginx installation into the AWS::CloudFormation::Init metadata as below. I only included the metadata part for readability.
...
Resources:
  ServerInstance:
    Type: AWS::EC2::Instance
    ...
    Metadata:
      AWS::CloudFormation::Init:
        config:
          packages:
            yum:
              nginx: []
          services:
            sysvinit:
              nginx:
                enabled: true
                ensureRunning: true
    Properties:
      ...
...
Let me explain this structure. Firstly, we have the default config key as we use a single config in our template. You can also use multiple configs and order them as you like. But for our example, a single config will be OK to start.
Then, we define the packages first, which is where the package installations will be performed during the launch. We define them under the package manager that will handle the installations, which is yum because we use an Amazon Linux 2 instance. So, under yum, we provide names of packages that will be installed with their versions as key-value pairs. In our example, the nginx package will be installed, and the usage of empty brackets ([]) means the latest version.
If you remember, we also started the Nginx web server in our previous UserData script. Hence, we also have the services section with the sysvinit key, which is for managing services on Linux instances. As expected, we have the nginx service in sysvinit, and it is both enabled and ensured to be running after cfn-init finishes.
Then, to make the AWS::CloudFormation::Init effective, we need to call the cfn-init helper script in the UserData section. This time, I included only the UserData part below.
...
Resources:
  ServerInstance:
    Type: AWS::EC2::Instance
    ...
    Properties:
      ...
      UserData:
        Fn::Base64: !Sub |
          #!/bin/bash -xe
          yum update -y
          yum install -y aws-cfn-bootstrap

          amazon-linux-extras enable nginx1

          /opt/aws/bin/cfn-init -v --stack ${AWS::StackName} --resource ServerInstance --region ${AWS::Region}

          /opt/aws/bin/cfn-signal -e $? --stack ${AWS::StackName} --resource ServerInstance --region ${AWS::Region}
...
We still keep the aws-cfn-bootstrap installation command because we cannot use CloudFormation helper scripts otherwise. Besides, we need the amazon-linux-extras enable nginx1 command to enable the nginx package for the packages section on Amazon Linux 2 instances. It will not be necessary for Ubuntu or other operating systems.
Then we call the cfn-init script under the /opt/aws/bin folder like the cfn-signal script, and it will use the AWS::CloudFormation::Init metadata to configure the EC2 instance accordingly. Here, the -v option is to get verbose output in the logs. The --stack-name and --region options are necessary as before. The --resource option provides the logical ID of the resource under which the AWS::CloudFormation::Init metadata is defined. In our example, it is also the ServerInstance resource.
If you noticed, I also changed the -s true option of the cfn-signal call to -e $?. This sends the result of the previous script, the cfn-init in our case, instead of a success signal in every case. So, if cfn-init succeeds, it will send a success or a failure, otherwise.
So, cfn-init brought a structure to our EC2 instance configuration. However, we still call it once in the UserData section and, therefore, only during the instance launch. Hence, let’s talk about the cfn-hup script next to use the AWS::CloudFormation::Init metadata and cfn-init for our config updates as well.
Cfn-hup: Updating your EC2 instance configurations
So, let’s discuss how you update the configurations you made on your EC2 instance with cfn-init. This is where the cfn-hup helper script shines.
cfn-hup works as a daemon on your EC2 instance and checks whether the AWS::CloudFormation::Init metadata changed from time to time. It performs this by caching the versions in each run. If there is a change, it calls cfn-init with the same parameters we used in the first call in the UserData.
But, for the cfn-hup to work, you must first configure it on your EC2 instance. You do this by placing two configuration files on your AWS::CloudFormation::Init metadata as below. It is also an example of creating files on your EC2 instances via cfn-init.
...
Resources:
  ServerInstance:
    Type: AWS::EC2::Instance
    ...
    Metadata:
      AWS::CloudFormation::Init:
        config:
          packages:
            yum:
              nginx: []
          files:
            /etc/cfn/cfn-hup.conf:
              group: root
              user: root
              mode: '000400'
              content: !Sub |
                [main]
                stack=${AWS::StackName}
                region=${AWS::Region}
                interval=5
                verbose=true
            /etc/cfn/hooks.d/cfn-auto-reloader.conf:
              group: root
              user: root
              mode: '000400'
              content: !Sub |
                [cfn-auto-reloader]
                triggers=post.add,post.update
                path=Resources.ServerInstance.Metadata.AWS::CloudFormation::Init
                action=/opt/aws/bin/cfn-init -v --configsets myConfigSet --stack ${AWS::StackName} --resource ServerInstance --region ${AWS::Region}
                runas=root
          services:
            sysvinit:
              nginx:
                enabled: true
                ensureRunning: true
              cfn-hup:
                enabled: true
                ensureRunning: true
                files:
                  - /etc/cfn/cfn-hup.conf
                  - /etc/cfn/hooks.d/cfn-auto-reloader.conf
    Properties:
      ...
...
Here, /etc/cfn/cfn-hup.conf is the main configuration file of cfn-hup. The group, user, and mode attributes set the permissions of this file on the EC2 instance’s OS. In our example, only the root user has read permissions, which will be sufficient. Then, you define the configuration parameters in the file contents:
[main]is required in the first line for cfn-hup to work.stackandregionsets the stack name and region of the stack, respectively.intervalsets the intervals cfn-hup will be triggered, which is 5 seconds in our example.verbosesets whether you want verbose output in logs. I find it useful for troubleshooting.
Once you configure cfn-hup, it uses the hook files placed under the /etc/cfn/hooks.d/ folder to detect changes in the metadata and take actions accordingly. In our example, we named it cfn-auto-reloader.conf, but it can have any name. As you see, the permissions settings are the same as the main config file, but the contents differ:
[cfn-auto-reloader]is the ID of the hook. It can be anything.triggersdefines when the action will be triggered. If you remember, cfn-hup caches the previous execution’s metadata and compares it in the next run. Sopost.addmeans when this metadata does not exist, whereaspost.updatecorresponds to the case it is different than the current one. I use both to catch also if a change is made before the first run ofcfn-hup.pathis the location of the metadata compared in the template. As you see, it corresponds to theAWS::CloudFormation::Initmetadata of the ServerInstance resource. This is the metadata cached and compared in the next run.- Then, the
actionsets the command to be executed if triggered. It is just the same cfn-init call we use in the UserData section.
If you noticed, there is also a service definition for cfn-hup in the services section. It enables and ensures that cfn-hup will be running after the first cfn-init call made during the instance launch. The files section under it defines the path of the files that will be monitored, and if they change, cfn-hup will be restarted. As you see, we set the cfn-hup configuration files there.
Hence, this completes the configuration of cfn-hup. From now on, you can edit the AWS::CloudFormation::Init metadata on your template and update your stack. After a while, the next cfn-hup run will start, and your updates will be performed. So, it is an asynchronous process; your stack will become UPDATE_COMPLETE before this happens, but cfn-hup will perform the updates eventually. However, please be sure to configure cfn-hup at the EC2 instance launch. Otherwise, it will not work.
Would you like to learn AWS CloudFormation and its helper scripts?
In this blog post, I tried to be concise while explaining how to manage your EC2 instance configurations with AWS CloudFormation. If you wish to learn UserData, cfn-init, cfn-hup and cfn-signal in more detail, please check out my AWS CloudFormation Step by Step: Intermediate to Advanced course on Udemy. This course teaches the intermediate to advanced level AWS CloudFormation features, including CloudFormation helper scripts with hands-on examples similar to ones in this post. In addition, we have examples of defining commands, using multiple config sets, and using EC2 Auto Scaling Group resources instead of standalone EC2 instances.
But if you are just beginning to learn AWS CloudFormation, I recommend finishing my beginner-level AWS CloudFormation course first, AWS CloudFormation Step by Step: Beginner to Intermediate, as its contents are a prerequisite for the advanced course.
For all our courses, please visit our courses page. It is also where we announce our new courses.
Conclusion
AWS CloudFormation helps you automate the provisioning of your AWS resources and manage your AWS infrastructure as code. In this post, I talked about a specific use case, managing EC2 instances with it. It became a long post as we covered the UserData property, CreationPolicy attribute and the CloudFormation helper scripts, cfn-init, cfn-hup and cfn-signal. I hope it helps you in your projects.
Thanks for reading, and see you in my AWS CloudFormation courses if you have not joined them yet!
References
- CloudFormation helper scripts reference
- My AWS CloudFormation Step by Step: Intermediate to Advanced course on Udemy
- My AWS CloudFormation Step by Step: Beginner to Intermediate course on Udemy