Amazon Route 53 offers domain registration services, and if you would like to keep your domains together as I do, you can easily transfer your current domain names to Route 53.
In the past, I bought some domains from GoDaddy, and today, I generally use Amazon Route 53 as my DNS service. It is time to renew some of our domain names, and I decided to move them to AWS as they are extended one year automatically after the transfer. This will allow me to manage my domain names and the services behind them all together on AWS. I will describe the process as a reference.
What are the requirements on the AWS side?
First of all, your domain should have been registered in your current registrar at least 60 days ago. It does not matter whether you bought, renewed, or transferred; the same applies, and this action should have also been at least 60 days ago.
Your domain TLD (.com,.co.uk, etc.) should be supported on AWS. Our domain has
.comTLD, but if it had an unsupported TLD such as.com.tr, we would not be able to move it to AWS.Some top-level domain names cannot be transferred until some changes, such as domain name owner, are completed. Your domain name should not be one of them.
If you have a regular
.comdomain name that you bought it at least 60 days ago and it has a valid status, you should be fine.Your domain should not be locked for transfer, pending for transfer, delete, or in redemption period.
Now, we need to connect to our GoDaddy account and unlock the transfer for our domain.
Unlock domain transfer on GoDaddy
Log in to GoDaddy and go to My Products and click on Manage under the domain name that will be transferred to access Domain Settings.

On the Domain Settings page, scroll to Additional Settings and click on Edit next to Domain lock.
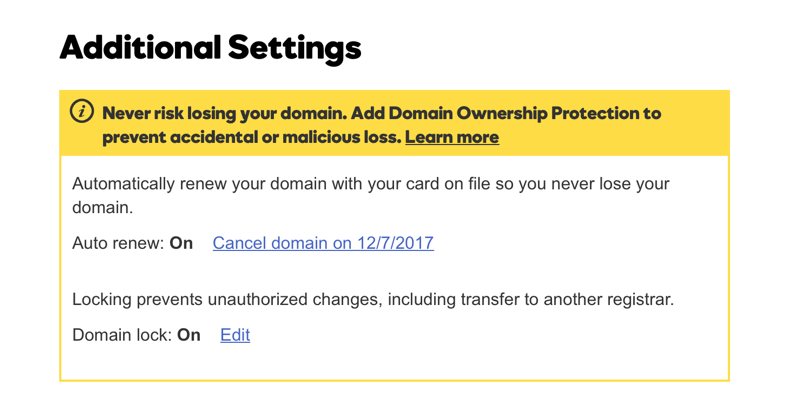
Then, turn it off, and the result should be as below. It may last for a few minutes for GoDaddy to process this change and send an email to the domain owner informing that the domain status has changed.
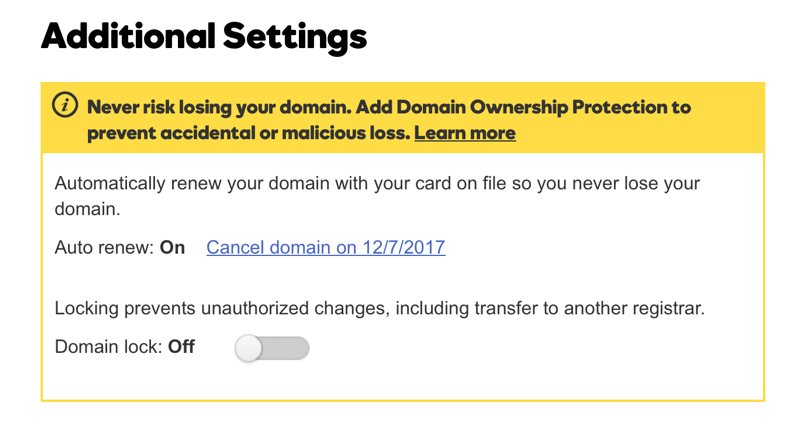
After receiving the Domain Status Notification email from GoDaddy as the domain owner, we are good to go.
Get an Authorization Code from GoDaddy to Authorize AWS
We need to get an authorization code from GoDaddy to authorize AWS to transfer our domain to Route 53. We will use this code on AWS Management Console while making domain transfer request.
Again, on the Domain Settings page, click Get authorization code under Additional Settings as below.

After this, GoDaddy will send the domain owner another email with the authorization code for transfer.
Requesting Transfer on Amazon Route 53 Console
Using the authorization code we received from GoDaddy, we will request a domain transfer from AWS. Then AWS will handle all necessary communication between GoDaddy.
Sign in AWS Management Console and go to Amazon Route 53 console. Under Domains, click on Registered Domains and then Transfer Domain. Enter the domain name, select the TLD from the list, and click Check.
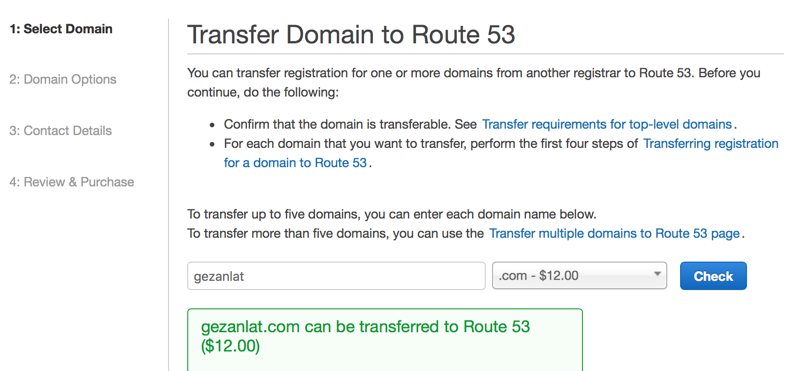
In this example, I chose a domain name we do not use currently. Therefore, I did not transfer my DNS settings to Amazon Route 53. But, you should move your DNS records to Amazon Route 53 before transferring your domain name not to break anything after the transfer. Otherwise, your website would be unavailable until you recreate all your DNS records on Amazon Route 53, too. Hence, Amazon Route 53 displays a warning message and asks us to confirm the change by clicking the check box as below.

Then, we click Add to cart to add the domain name transferred to the shopping cart.

As you can see, we can add other domains if we need and handle all of this at once. For now, I will not add any more and click Continue at the bottom of the page.
Next, enter the authorization code received for your domain name into the Authorization code field. AWS asks how to manage DNS. If you moved your DNS settings to Amazon Route 53 before this operation, select the second option and choose your hosted zone.

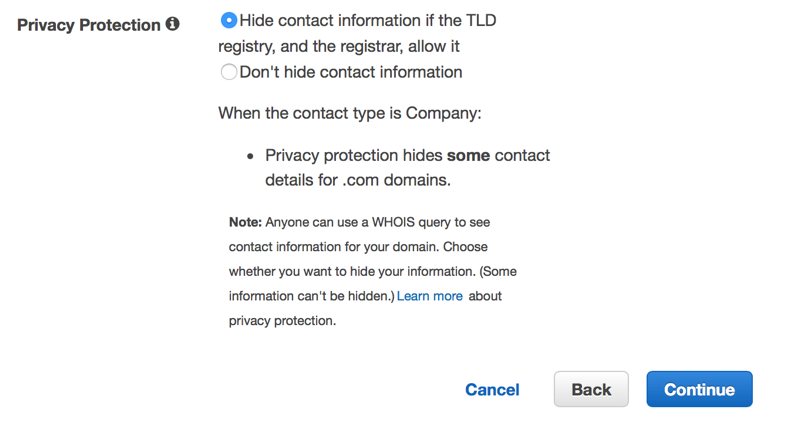
Click Continue and fill in the registrant information form. As you see below, you can choose to hide your information for free. This means that when people search the WhoIs database, your data will be hidden publicly and only be provided to ICANN for registration purposes. AWS will replace emails with unique emails and forward them to your email address if you need to be contacted as the domain owner.
Click Continue once again and review your information on the opening page. If everything is OK, click the check box to approve the Terms and Conditions and click Complete Purchase.

Authorizing Domain Transfer for Amazon Route 53
After completing the above, you will see your domain name in the Pending Transfer section.

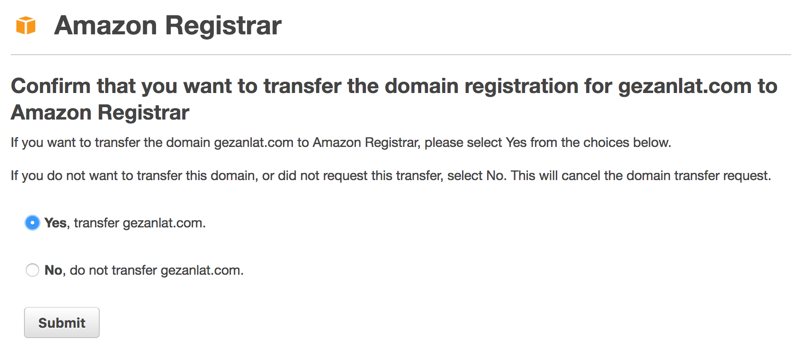
AWS will send an email to the domain owner to authorize the transfer. Open the email and click the link AWS sent. Then, select Yes on the page opened and click Submit.
As you can see, the status changes in Pending Transfers.

Approving the Transfer on GoDaddy
Now we have one thing remaining, approving the transfer on GoDaddy. After completing the domain transfer request on Amazon Route 53, GoDaddy will send an email to approve the transfer within minutes.
Go to My Domains on your GoDaddy account and click view details under Pending transfer out.

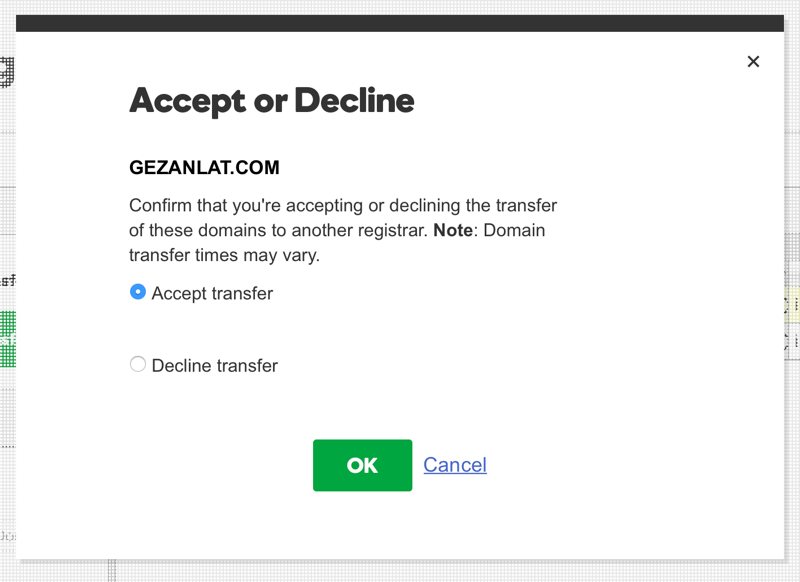
Then, select your domain name and click Accept or Decline.

Lastly, choose Accept Transfer on the dialog box opened and click OK to start the transfer.
Now, let’s wait for a while until our domain name transfer is completed.
Completion of the Transfer
Once all messaging between AWS and GoDaddy is completed, AWS sends the domain name owner to inform that transferring the domain to Amazon Route 53 succeeded. GoDaddy also sends an email that they are sorry.
After finishing, you can see that your domain is listed under Registered domains on your Amazon Route 53 console.

A Note on DNS Settings
If you need to transfer an active domain name, you should move your DNS setting to Amazon Route 53 as a hosted zone first and wait for at least 48 hours to ensure that your DNS changes propagate worldwide. Afterward, transferring your domain name’s registration to Amazon Route 53 will also handle your DNS settings seamlessly, and no downtime will occur because of the transfer.
Conclusion
Amazon Route 53 is an excellent choice as a DNS service with many features that we may discuss in later posts. AWS also provides a domain name registration service on Amazon Route 53, and if you would like to move from GoDaddy to AWS, I hope this post will make it easier for you. Actually, the whole process lasts less than one hour.
Thanks for reading!


